
Tutorial: How to create a candle yourself?
Summary
You want to create your own craft candle, and we understand you! Natural, personalized, and above all DIY, it makes you want .... but can also sometimes be scary.
So if you want to get into the realization of your craft candle, but don't know how to do it, look no longer: this article is for you!
In this article, we will explain the main steps to follow to you, the recipe for creating Homemade candles, as well as some tips, ideas and advice to succeed.
For DIY fans, do you know Our kits do it yourself ? A good way to learn know-how during a creation accompanied by the advice of one of our craftsmen.
Make your own 5 -step candle
If before you start, you want to know all our secrets on craft candles Or if you are not very manual. We tell you everything in our guide on Artisanal and natural candles Flowrette.
To inspire you, do not hesitate to look at our craft candles !
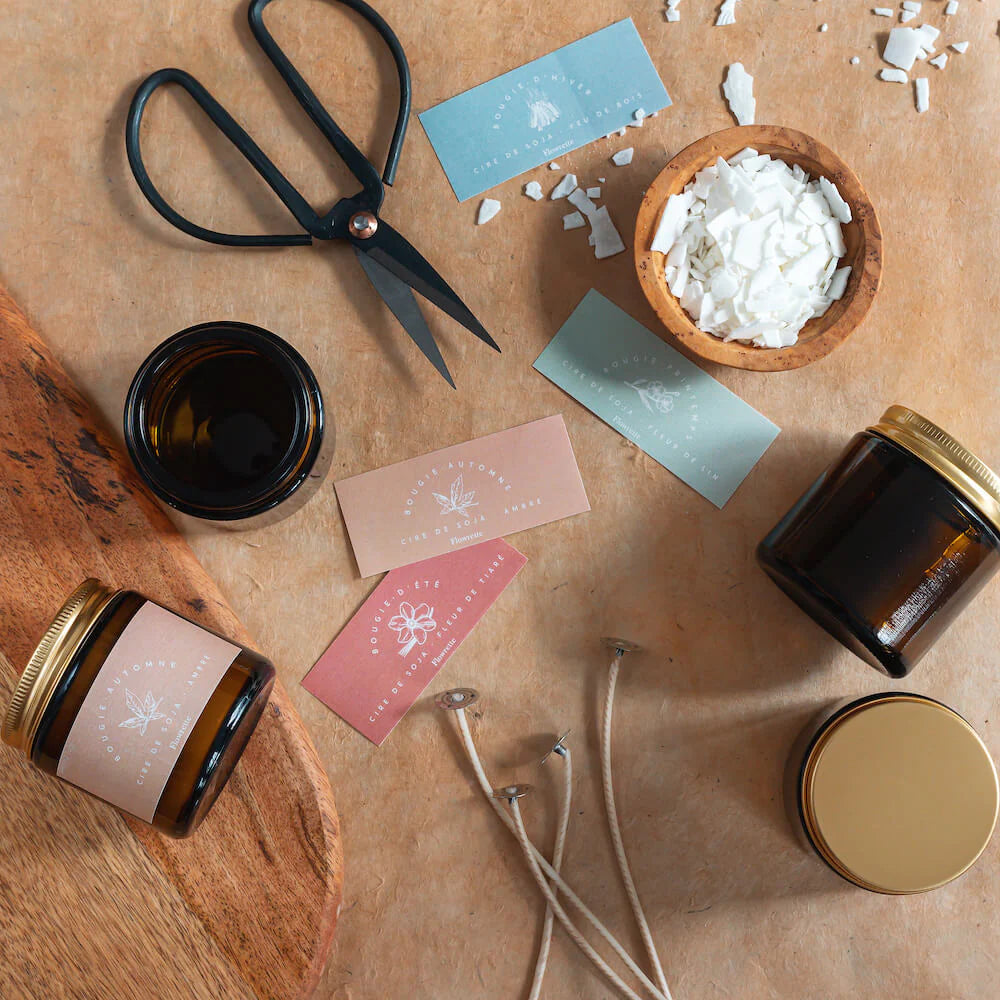
Start manufacturing your Homemade candle: bring together all the necessary equipment
To create DIY candles, you have to start by bringing together all the necessary equipment. You will actually need wax, wicks, containers, a pair of scissors, a pan and tweezers.
And if you want to make Flower candles, you need to dry a few flowers, or use already dried flowers. That's good, at Flowrette, we offer a wide selection of dried flowers with a boot.
You can also make Scented candles By investing in vegetable oil such as ylang-ylang essential oil, rosat geranium essential oil or peppermint essential oil. You can also use Homemade essential oils. A scented candle will bring a cocoon atmosphere to your interior, with cinnamon for Christmas or jasmine for spring for example.
Step 1: Melt the candle wax in a bain marie
After gathering everything you will need to make your craft candle, you have to melt the wax in a double boiler. This is where you need to use the pan. In this step, the amount of wax must be provided depending on the size and number of craft candles to be created.
For the most natural candle possible, we advise you to favor a natural wax such as beeswax for molded or flower candles or vegetable wax for a vegan version.
It should be noted that unlike paraffin, natural wax burns slowly without smoke. But it is a little difficult to flavor and color. Despite this, we still recommend that you turn to natural and plant waxes to make your Homemade candle. You will have the advantage of using it for a long time.
Step 2: Mix the wax to a coloring
To continue, you need to mix the wax with a dye. Of course, this step is optional, since you do not have to color your candles. You can perfectly opt for white candles, that is to say for candles that look simple and pure. This will give your candle a really natural effect.
Small tip, if you want to integrate dried flowers in your candle, they will come out much more with a white -color candle.
Step 3: Add a few drops of essential oil
The next step is to add a few drops of essential oil in the containers. Here you can vary the essential oils to use according to the desired atmosphere. Choose an essential oil according to your tastes.
Know that the scent of Scented candles Can hide bad smells and create a zen and soothing atmosphere in a room. The choice of the scent of your craft candle therefore has all its importance!
We tell you everything in this article on the perfumes we prefer at Flowrette. Of the candle perfumes Depending on the atmospheres and the seasons.
Step 4: Pour the hot wax into the containers
Once the essential oil has been added, you can pour the hot wax into your containers. You can use different sizes and shapes of containers to create candles according to your tastes. Varying the containers will allow you to Personalize your decor.
You can use a glass jar, a terracotta container in terracotta, or even a vintage cup as a container to match your interior decor.
Little tip, our containers were worked with craftsmen in different subjects. If you have already used a Flowrette candle, do not hesitate to reuse the containers once your flower candle is finished, they are made for that!
For that, it can be useful to read our guide to remove the wax remaining at the bottom of your jewelry.
For the quantity, we advise you to fill the container with your Homemade candle half or three-quarters.
Step 5: Place the wicks
The next step is to insert the wicks. Here, you have the choice between wax wicks, woven wicks, cotton wicks and wooden wicks.
Once the type of wick is chosen, you must fix them each to a support, then place them at the bottom of your containers.
At Flowrette, we love to use several locks in a single container. But it obviously depends on the size of the latter to avoid concerns.
Step 6: Let the wax cool
When your container mixed, with the wick well in place, you should let the wax cool in the open air.
It’s not worth using your favorite range or your hair dryer to cool the wax. You just have to wait a few hours until it cools on its own.
Our advice: During this wait, you should not touch the wicks, otherwise you may damage the wax above your candles and you cannot benefit from a very smooth support. For the same reasons, avoid moving your container.
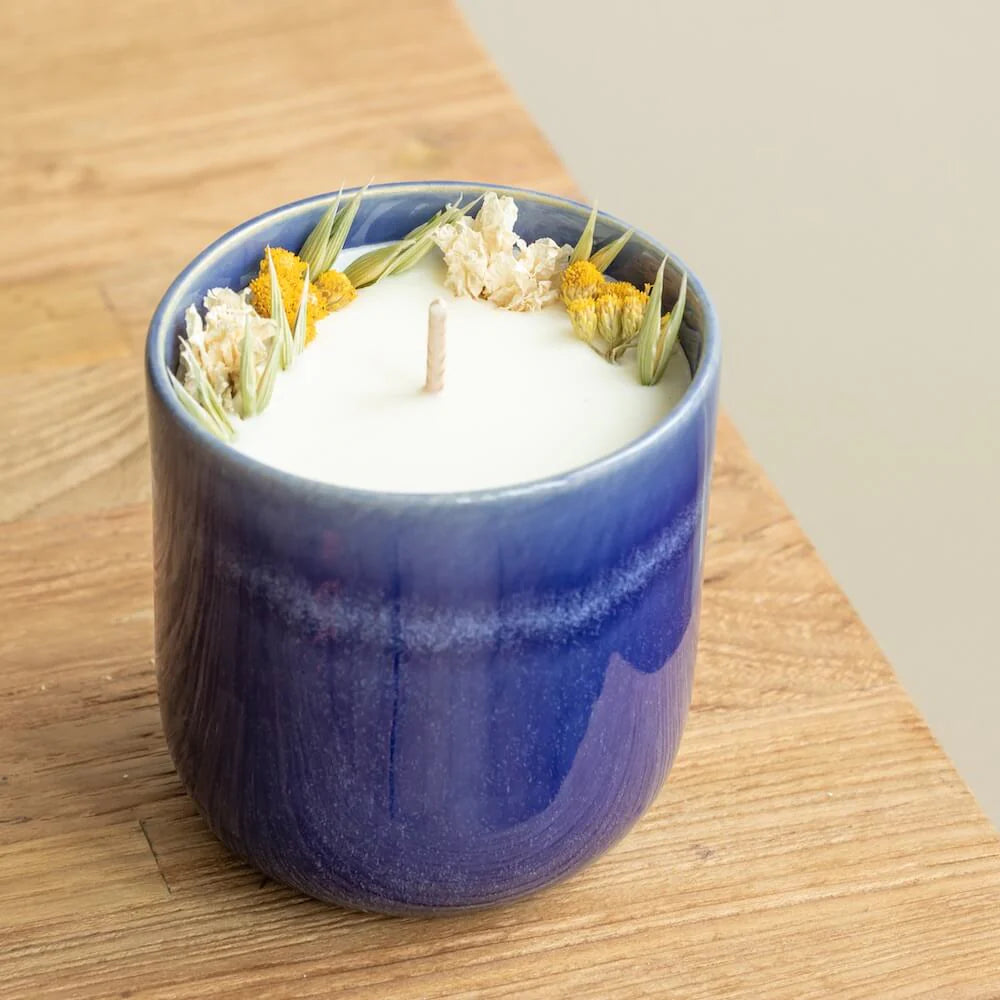
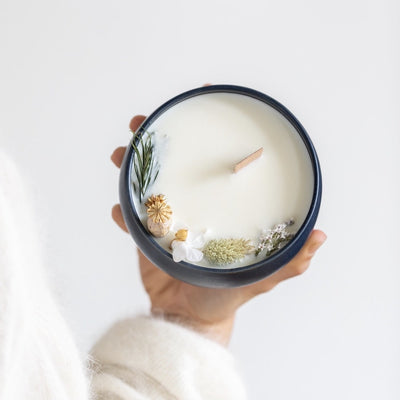
Step 7 (optional): Place the dried flowers
To create Flower candles, you should have dried flowers using tweezers on your creations. Here you can mix different varieties of flowers to get a nice rendering. Then, you can also play with sizes and colors to personalize your candles well.
Our tip: After dropping off the dried flowers, you have to fix them with a few drops of liquid wax. Like this, they are not likely to fly away in the event of air current.
During this stage, you have to be careful not to place your dried flowers too close to your wicks so that they do not inflame when you turn on your candles.
How to use An artisanal candle?
When your craft candles are ready, you can put them on a table during a large family meal or a romantic dinner.
Otherwise, expose them on shelves, on the fireplace or in a corner in your house. At Flowrette we love to associate several candles of different tails in the same space.
You can also offer your loved ones: craft candles are always very decorative even if they are not on. In addition, they are reusable if you opt for good ingredients.
Speaking of reusable candles, know that you can make craft candles with plug remains. To do this, you must start by cutting the leftover candles into small pieces. Then you have to melt them in a double boiler by adding wax. Pour the solution obtained in containers. Then put and fix your wicks at the bottom of the latter before letting the wax cool.
If you have plug remains of different colors, we advise you to pour the color -colored wax by color. Like this, you can benefit from DIY candles with strata of all colors.

You are now an expert in the manufacture of scented craft candle! As you can see, it is not so difficult to create homemade candles. You just have to respect the different steps to follow. Then, you have to equip yourself with quality ingredients and equipment. As you can see, everything is done by hand.
Our little tips for the decor of your home: do not hesitate to put your craft candle in other locations than your living room. At the edge of the water in your garden if you have one, a scented candle in your bathroom, one in a glass jar in the middle of the jars of your kitchen ... Do not hesitate to make your candles according to the Deco of the place where you want to put it, varying the container, the perfume, the wax ... you have the choice!
What we like is that there are so many options to personalize the craft candles, that we can create endlessly for all tastes! From the container to the scented essential oils, the possibilities are endless! We also offer you our 5 favorite craft candles At Flowrette.

Écrire un commentaire
Bonjour a tous je viens de tombé sur votre article bien expliqué je vous remercie par contre pourriez vous m’aider s’il vous plaît, moi des fois quand je fait ma bougie au séchage il y a un grand creux au niveau de la mèche comment il faut que je fasse pour ne plus avoir ses creux merci pour votre retour bonne continuation
Intéressant, mais c’est dommage qu’il n’y ait pas plus de précisions sur les quantités, les tailles, voire des liens ou des références vers les bons produits à acheter. Je vais devoir consulter d’autres sites avant de me lancer à créer mes propres bougies car il n’y a pas de références…
Merci pour vos bonnes explications il y a plus qu à faire. Bonne chance à vous.
Bonjour,
je vous remercie infiniment pour votre partage. je vais commencer ma création et vous partagerai ce que j’aurai réalisées.
A très bientôt.
Cordialement
1
#comments 2 #comments 3…
#comments 6